-Photoroom.avif)


Creating Gridlines for Construction Layout: Laser Levels vs. LightYX
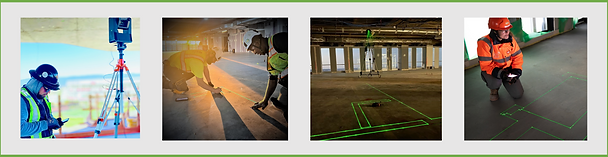
Creating precise gridlines for construction layouts is essential for ensuring accuracy in wall placements, flooring, and fixture alignments. Gridlines serve as reference locations for all trades, including drywall and MEP. If there are no survey points, the drywall team is usually responsible for establishing the gridlines, which is a time-consuming process. Accuracy is critical, as it determines the precision of the entire layout that follows. Traditionally, laser levels have been used for this task, requiring careful setup and manual marking. However, with LightYX technology, the process is much simpler, leveraging survey points or column scans to automatically project gridlines and layouts. Below is a comparison of both methods.
Using Laser Levels for Gridlines
Tools and Materials Needed:
- Laser level (preferably a self-leveling cross-line or rotary laser level)
- Measuring tape
- Chalk line or marking pen
- Paper or Digital layout plans
- Safety glasses
Step-by-Step Guide:
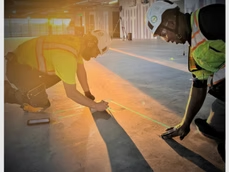
1. Prepare the Workspace
Before setting up the laser level, clear the workspace of any obstructions. Ensure that the floor is clean and dry to allow for accurate marking.
2. Set Up the Laser Level
- Place the laser level directly on the floor for the most accurate projection.
- Adjust the device to the desired position based on the layout plan.
- Turn on the laser level and allow it to self-level (if applicable). If using a manual laser level, adjust it carefully using the built-in leveling bubbles.
3. Determine Reference Points
- Using a measuring tape, locate key reference points based on the construction plans.
- Common reference points include the corners of walls, the middle of columns, or predetermined survey points.
- Mark these points lightly with a pencil or chalk for easy visibility.
4. Project the First Gridline
- Position the laser level so that it projects a straight horizontal or vertical beam aligned with the first reference mark.
- Adjust the laser’s position until the beam aligns with your desired starting point.
- Mark the beam line on the floor, ceiling, or wall using a chalk line or marker.
5. Establish Perpendicular Gridlines
- Rotate or reposition the laser level to project a perpendicular line to the first.
- Use a square to verify 90-degree angles where necessary.
- Mark the intersecting points to form the grid.
6. Expand the Gridlines
- Many times, the easiest way to create gridlines is by using offset lines from the column locations. By measuring from the structural columns and projecting lines at regular intervals, you can quickly establish a consistent grid.
- Continue repositioning the laser level and marking additional lines based on the layout plan.
- Ensure that each new line aligns with the previous markings to maintain accuracy.
7. Double-Check Measurements
- Use a measuring tape to verify spacing between gridlines.
- Make any necessary adjustments before proceeding with the layout installation.
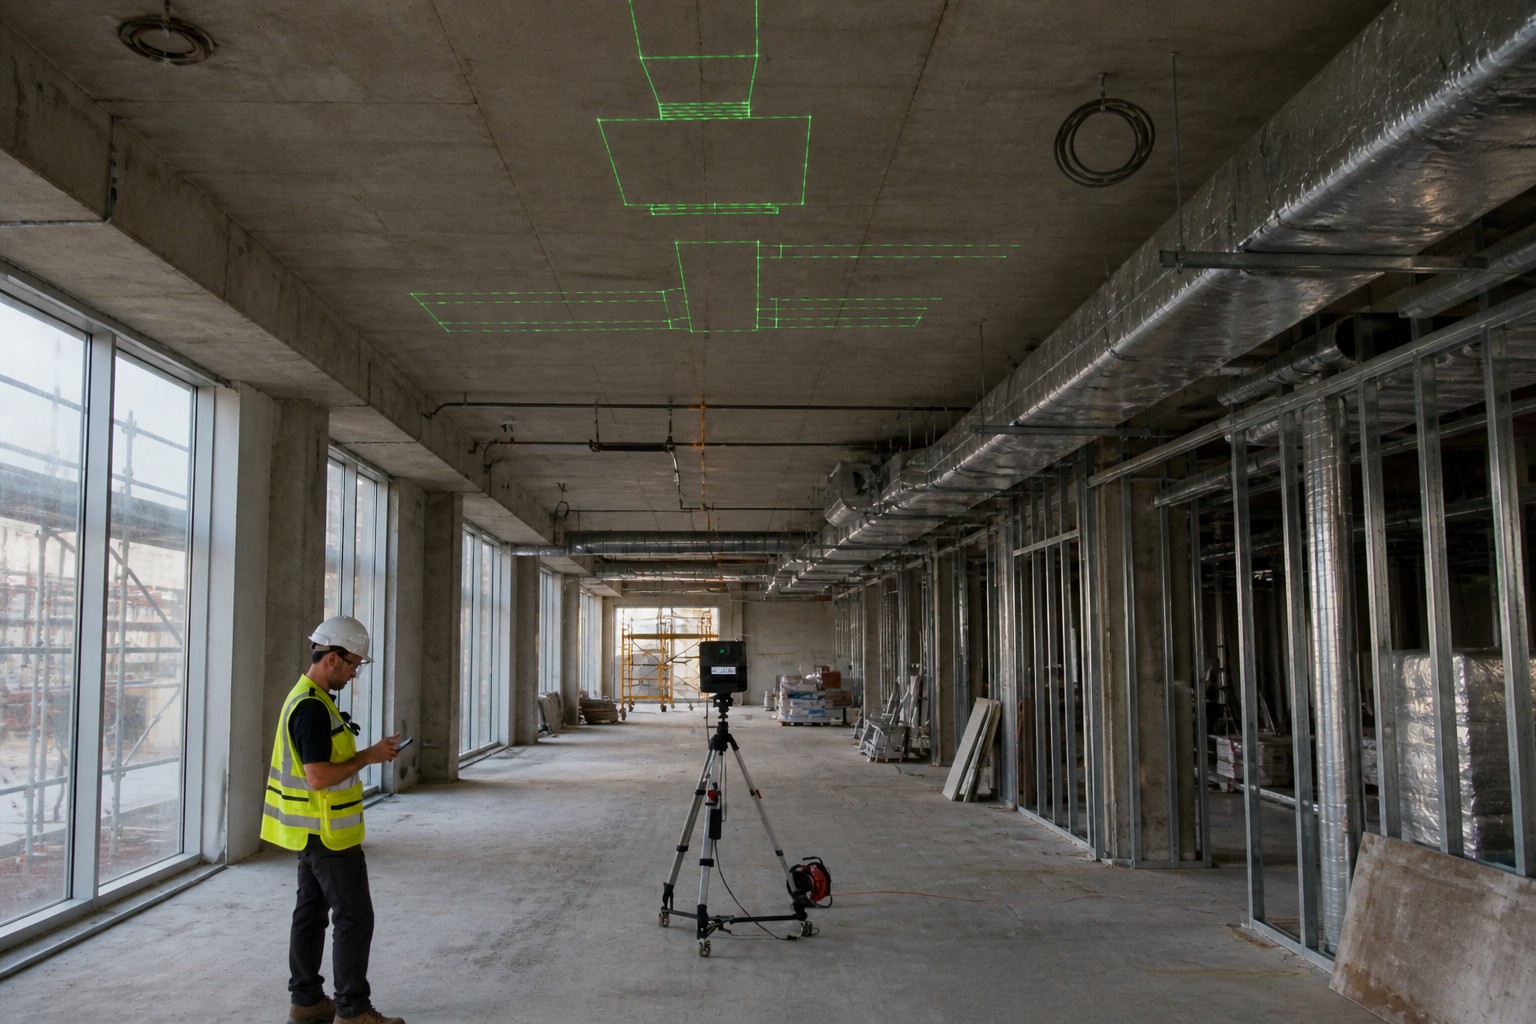
Using LightYX for Rapid Gridlines Layout
LightYX simplifies the process significantly by automating the layout projection using advanced laser technology. Instead of manually marking and aligning gridlines, LightYX can quickly establish accurate layouts with minimal effort.
How LightYX Works:
- Use Survey Points or Scan Columns/Walls – The system can either use pre-set survey points or scan a few column locations to establish accurate positioning.
- Automated Gridline Projection – Once the reference points are established, LightYX automatically projects the entire gridline layout onto the floor, ceiling, or walls.
- Real-Time Adjustments – If necessary, adjustments can be made in real time, ensuring high precision without the need for manual re-measuring and marking.
Advantages of LightYX Over Traditional Laser Levels:
- Faster Setup – No need for manual positioning and alignment of laser levels.
- Higher Accuracy – Eliminates human error in marking and spacing gridlines.
- Complete Layout Projection – Instead of drawing individual lines, LightYX can project the entire layout directly onto the site.
- Better Efficiency – Reduces layout time significantly, allowing teams to start construction sooner.
Conclusion
While traditional laser levels are useful for creating construction gridlines, they require manual setup, multiple steps, and verification. LightYX, on the other hand, streamlines the entire process by scanning reference points and instantly projecting the gridlines and layout. By adopting LightYX, construction teams can save time, reduce errors, and increase efficiency in layout preparation.